Quantcast
Channel: windows mobile – Windows CE Programming
Viewing all 25 articles
Browse latest View live

Mobile Development: PingNG-the next generation ping

$
0
0

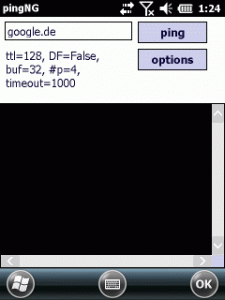
As I needed a tool to test the maximum MTU size for a network, I needed a ping tool where I can define the packet size and the DF (Do Not Fragment-Flag). As I did not find such a tool, I wrote PingNG.

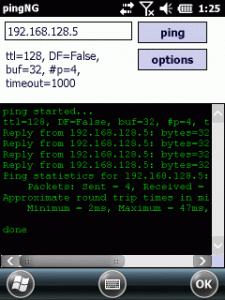
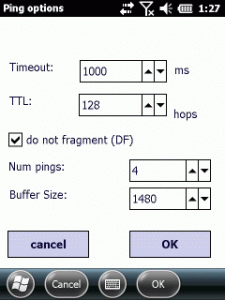
main main2 options_df

It is a simple tool but the code had to avoid some pitfalls.

First, if you enter a host name, it has to be translated to an IPAddress before you can use an IcmpEchoReply. But GetHostEntry API call blocks. It will especially block very, very long if you enter an unknown host. If you want to offer a responsive GUI, we need a way to limit the time allowed to resolve the host name:

        bool checkHost(ref HostParms hostParms)
        {
            bool bRet = false;
            IPHostEntry ipHost = new IPHostEntry();
            try
            {
                IPHostEntry entry = null;
                int maxSeconds = hostParms.retry/* 10 */, counter = 0;
                // see http://jianmingli.com/wp/?p=22
                // Start the asynchronous request for DNS information. 
                // This example does not use a delegate or user-supplied object
                // so the last two arguments are null.
                IAsyncResult result = Dns.BeginGetHostEntry(hostParms.host/* ipAddress */, null, null);
                // Poll for completion information.
                while (result.IsCompleted != true && counter < maxSeconds)
                {
                    Thread.Sleep(1000);
                    counter++;
                }
                if (result.IsCompleted) //when we got here, the result is ready
                    entry = Dns.EndGetHostEntry(result);    //blocks?
                else
                    hostParms.isValid = false; // Thread.CurrentThread.Abort();
                hostParms.ipAddress = entry.AddressList[0];
                hostParms.isValid = true;
            }
            catch (ThreadAbortException e)
            {
                Thread.CurrentThread.Abort();// ("DNS failed within timeout", e);
            }
            catch (Exception e)
            {
                System.Diagnostics.Debug.WriteLine(string.Format( "Exception in checkHost({0}): {1}", hostParms.host, e.Message));
            }

            return hostParms.isValid;
        }

The above checkHost function will be called by a thread and will either deliver a valid response or returns after a specified timeout.

As the IcmpReply API call itself blocks too, the ping is wrapped into a thread. The status is delivered to the GUI using delegates and event subscribers.

        //thread to do ping
        public void startPing(string sHost, PingOptions pOptions)
        {
            System.Diagnostics.Debug.WriteLine("+++thread started");
            string ipAddress = sHost;//make a local copy
            Ping myPing = new Ping();
            PingOptions myPingOptions = pOptions;//make a local copy
            
            int iTimeout = pOptions.TimeOut;
            int _numberOfPings = pOptions.numOfPings;
            bool doNotFragment = pOptions.DontFragment;
            int bufferSize = pOptions.bufferSize;
            byte[] buf = new byte[bufferSize];

            //long sumRoundtripTime=0;
            onReply(new PingReplyEventArgs("ping started...",PingReplyTypes.info));
            replyStats _replyStats = new replyStats(ipAddress);
            PingReply reply = null;
            try
            {
                onReply(new PingReplyEventArgs(pOptions.ToString(), PingReplyTypes.info));
                //check DNS first as this may block for long time
                IPAddress address;
                HostParms hostParms = new HostParms(ipAddress, 4);
                try
                {
                    //is IP address
                    address = IPAddress.Parse(ipAddress);
                    hostParms.isValid = true;
                }
                catch
                {
                    if (checkHost(ref hostParms))
                        ipAddress = hostParms.ipAddress.ToString();
                }
                if (!hostParms.isValid)
                    throw new PingUnknownHostException("Unkown host: " + ipAddress);

                for (int ix = 0; ix < _numberOfPings; ix++)
                {
                    reply = myPing.Send(ipAddress, buf, iTimeout, myPingOptions);
                    string sReply = "";
                    if (reply.Status == IPStatus.Success)
                    {
                        //sumRoundtripTime += reply.RoundTripTime;
                        _replyStats.add(1, 1, reply.RoundTripTime);
                        sReply = myResources.getReply(reply, ipAddress);
                    }
                    else if (reply.Status == IPStatus.DestinationHostUnreachable)
                    {
                        _replyStats.add(1, 0, reply.RoundTripTime);
                        throw new PingUnknownHostException("Destination unreachable");
                    }
                    else
                    {                        
                        _replyStats.add(1, 0, reply.RoundTripTime);
                        sReply = myResources.getReply(reply, ipAddress);
                    }
                    System.Diagnostics.Debug.WriteLine(sReply);
                    onReply(new PingReplyEventArgs(sReply));
                }
                onReply(new PingReplyEventArgs(_replyStats.ToString(), PingReplyTypes.info));
            }
...

The small tool could be extended to do automatic sweeps over varying IP addresses or with varying packet sizes.

If you specify a packet size that is beyond the MTU and set the DF flag you will get the correct answer:

ping started...
ttl=128, DF=True, buf=1480, #p=4, timeout=1000
IPStatus.PacketTooBig
Ping statistics for 192.168.128.5:
    Packets: Sent = 4, Received = 0, Lost = 4 (100% loss),
Approximate round trip times in milli-seconds:
    Minimum = 0ms, Maximum = 0ms, Average = 0ms

done

By reducing the packet size you will get a working ping:

ping started...
ttl=128, DF=True, buf=1472, #p=4, timeout=1000
Reply from 192.168.128.5: bytes=1472 time=8ms TTL=128
Reply from 192.168.128.5: bytes=1472 time=5ms TTL=128
Reply from 192.168.128.5: bytes=1472 time=4ms TTL=128
Reply from 192.168.128.5: bytes=1472 time=6ms TTL=128
Ping statistics for 192.168.128.5:
    Packets: Sent = 4, Received = 4, Lost = 0 (0% loss),
Approximate round trip times in milli-seconds:
    Minimum = 4ms, Maximum = 8ms, Average = 5ms

done

The ICMP reply has a lot of possible result codes. PingNG only evaluates some of them in depth. To display the statistics, I created a new class

    public class replyStats
    {
        public int sent=0;
        public int rcvd=0;
        public int percentLost
        {
            get
            {
                if (sent != 0)
                    return ((lost * 100) / sent);
                else
                    return 100;
            }
        }
        public long minTrip=0;
        public long maxTrip=0;
        public long avgTrip{
            get
            {
                if (sent == 0)
                    return 0;
                if (tripValues.Count == 0)
                    return 0;
                int sum = 0;
                foreach (int v in tripValues)
                    sum += v;
                int avg = sum / tripValues.Count;
                return avg;
            }
        }
        List<long> tripValues=new List<long>();
        string ipAddress = "";
        public int lost
        {
            get
            {
                return sent - rcvd;
            }
        }
        public replyStats(string sIPaddress){
            ipAddress = sIPaddress;
            minTrip = long.MaxValue;
            maxTrip = 0;
        }
        public void add(int iSent, int iRcvd, long lTrip)
        {
            if (lTrip < minTrip)
                minTrip = lTrip;
            if (lTrip > maxTrip)
                maxTrip = lTrip;
            tripValues.Add(lTrip);
            sent += iSent;
            rcvd += iRcvd;
        }
        public override string ToString()
        {
            string s = string.Format(ReplyStats, ipAddress,
                sent, rcvd, lost, percentLost,
                minTrip, maxTrip, avgTrip);
            return s;
        }
        const string ReplyStats = "Ping statistics for {0}:\r\n" +
            "    Packets: Sent = {1}, Received = {2}, Lost = {3} ({4}% loss),\r\n" +
            "Approximate round trip times in milli-seconds:\r\n" +
            "    Minimum = {5}ms, Maximum = {6}ms, Average = {7}ms\r\n";
    }

This class can report the stats if you add the single ICMP results on every return. For example, for a successful ping:

_replyStats.add(1, 1, reply.RoundTripTime);

There are still many enhancements possible. The project is done in VS2008 using Compact Framework 2.0 and targets Windows CE and will run nice on Windows Mobile too.

The code is hosted at code.google.com as part of my win-mobile-code repo.


rdesktopce builds done with LOW_RES ‘marker’

$
0
0

I have added two new build variants to rdesktopce_rdp5 (see also older article).

The normal builds make Windows Mobile ‘think’ the app is HI_RES_AWARE and so QVGA screens (see geometry setting in winrdesktop.ini) are NOT scaled to the larger screens of current devices:

with HI_RES_AWARE and geometry=240×320 on a WXGA screen:

ScreenShotFullscreenQVGA_on_WXGA_HIRES

If you have read my article “Remote Desktop Mobile on VGA devices: QVGA applications do not scale well” you know that Windows Mobile will scale the application output if the application is not HI_RES_AWARE.

with Subsystem version 4.20 and geometry=240×320 on a WXGA screen:

ScreenShotFullscreenQVGA_on_WXGA_LOWRES

The effect is simple, Windows Mobile will scale the application output, if the application uses a lower resolution like QVGA.

As rdesktopce_rdp5 does not use the HI_RES_AWARE resource, the only indicator for the awareness is the Subsystem version. This version number can be simply changed in the Linker Settings of the Visual Studio project. Right click on the project in Solution Explorer of Visual Studio, then look at Properties>Configuration Properties>Linker>Command Line. Replace the Additional Options entry ‘/subsystem:windowsce,5.01’ by ‘/subsystem:windowsce,4.20’ and save that change. Now do a build and you get an application exe with Subsystem version number 4.20.

Note: if the geometry setting is larger than the lowres QVGA resolution (240×320), then you get only a small part. Example: device screen resolution is 480×800, geometry is ‘geometry=480×640’, then you will only a QVGA view of the terminal server screen (left image). The right image shows what you get with the HI_RES_AWARE rdesktopce_rdp5 version on the same device:

ScreenShotFullscreenVGA_on_WXGA_LOWRES ScreenShotFullscreenVGA_on_WXGA_HIRES

I have added two build variants for these LOW_RES builds, so one can simply build a HI_RES_AWARE or a lowres exe file.

Latest source code and binaries at github (lowres release binary, hires release binary)

Mobile Development: Subclass foreign Window using injectDLL

$
0
0

Recently we needed to show and hide the SIP (Software Input Panel) inside a full screen Remote Desktop Mobile session.

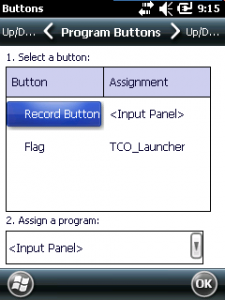
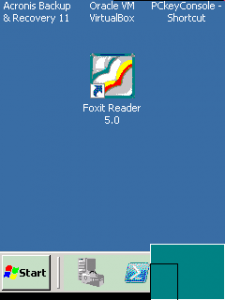
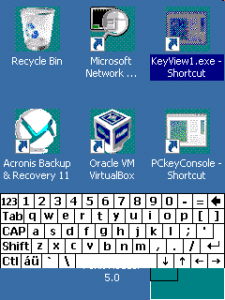
The first challenge is to control the SIP without having a menu bar with the SIP symbol inside. To get this working you can assign a hardware keyboard button, it must be an App button, to show the SIP. See Settings>Personal>Buttons and assign “<Input Panel>” to the hardware key.

app_button_to_input_panel RDM_fullscreen_option RDM_fullscreen RDM_fullscreen_with_SIP

Unfortunately the SIP will be hidden immediately after being shown if RDM is started with Full Screen option.

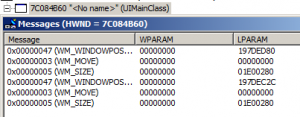
To overcome this I looked at the Windows Messages inside the RDM window tree and found that there is a Windows Message WM_WININICHANGE send to the main RDM window every time the SIP is shown. Inside the UIMainClass window the SIP show will result in some more messages, Now, if we can suppress the WM_WININICHANGE message, the SIP may stay until hidden manually, hopefully.

tsshellwnd_on_sip_show  UIMainClass_on_SIP_show

But how can one hook in a foreign Message Pump (WndProc)? Fortunately there is a general option provided by Windows CE / Mobile to inject one or more DLLs into every started process. Simply add your DLL to the registry key HKLM\System\Kernel\InjectDLL. The type of InjectDLL is REG_MULTISZ.

Now the DLL that I wrote compares the Module File Name of the process that is calling DLL_ATTACH with the Module File Name of RDM, which is “\Windows\wpctsc.exe” on Windows Mobile/Embedded Handheld. If the Module File Name matches, the code looks for the Windows Class “TSSHELLWND”. If this is found, the RDM window has been loaded and initialized. Now the DLL code looks for the child window with class “UIMainClass”. This window marks a remote session has been started. If found, the code uses SetWindowLong and hooks a custom WndProc into the main RDM window. This custom WndProc simply looks for the Window Message that hides the SIP and just returns a TRUE, as if the message has been processed. The other window messages are forwarded unchanged to the original WndProc. The message we filter is WM_WININICHANGE with lParam==133071496.

Remember that ‘subclassing’ a window is only possible from inside the process that created the window. But using InjectDLL the DLL code is part of the RDM process (and all others) and you can subclass the ‘foreign’ window.

RDM_fullscreen_with_SIP

The only ‘disadvantage’ here is the position of the SIP. As there is no menu bar, the SIP is floating above the lower border. But there are custom SIPs you can move around, if this is a no-go for you.

The demo RDMinjectDLL.dll has to be copied to \Windows and then you need to edit the registry of the device:

REGEDIT4
[HKEY_LOCAL_MACHINE\System\Kernel]
"InjectDLL"=hex(7):\
 5C,57,69,6E,64,6F,77,73,5C,52,44,4D,69,6E,6A,65,63,74,44,6C,6C,2E,64,6C,\
 6C,00

The hex codes are nothing else than the string “\Windows\RDMinjectDLL.dll” (without quotes). After changing the registry, the device needs to be rebooted.

During development I had to remove the reg entry, reboot, deploy a new version, change the reg back and reboot again to test the new version.

Download DLL and .reg file: DOWNLOAD:RDMinjectDLL - (Hits: 111, size: 5.62 kB)

Windows 2012 R2 Terminal Service does not render Desktop if resolution width less than 600

$
0
0

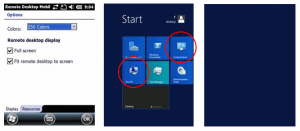
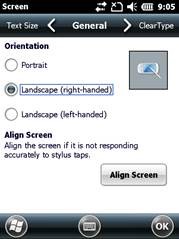
Recently I had to realize that w2k12 only shows an empty background when connecting to a new Terminal Service session and the requested resolution is 240×320, 480×640 or 480×800. These reolutions are used by Remote Desktop Mobille if you select the option “Fit remote desktop to screen”.

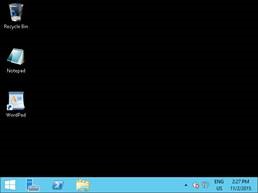
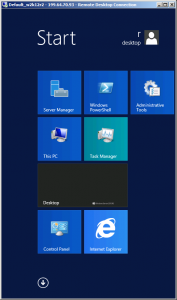
After login, the Start screen (Metro-Ui) is shown, regardless of having set TS to start new sessions always in Desktop mode. If you then start a desktop application or simply the “Control Panel” or “My Computer”, which are Desktop apps both, the screen changes to show an empty (Start screen) background only.

rdm_fullscreen

The apps are started on the desktop, but the desktop will not be shown by TS!

If you first start the session with a supported resolution, let’s say 800×600 or even 600×800, and then just disconnect the session (do not logout) and reconnect to the existing session with an unsupported resolution, the Desktop and running apps will be shown normally.

rdm_landscape_00 rdm_landscape_01

This is not an issue with Remote Desktop Mobile only. If you try this with a Windows 7 or Windows 8 TS client, the desktop will not be rendered by TS if the session has been started with an unsupported resolution. The resolution must be changed manually in a saved rdp file, as these clients only support resolutions down to 800×600. Then use the saved rdp file to start a new session.

screen mode id:i:1
use multimon:i:0
desktopwidth:i:480
desktopheight:i:800

Result trying to start “Control Panel”:

win7_480x800 win7_480x800_01

If you test Remote Desktop on a Windows Phone 8 device, for example, you will not be able to change the resolution. The Terminal Server uses the default resolution (1024×768) and the windows phone screen is always shown in landscape view.

Seems to be a bug in TS. Especially as if starting the session with a supported res. and then reconnecting with an unsupported res. the TS will render correctly. It will only not render the desktop, if the session is started with an unsupported res.

Mobile Development – Start apps with another using injectDLL

$
0
0

I already posted one article about using injectDLL, one about subclassing a foreign window. This time injectDLL is used to start and stop an application when another app is started. Remember that every DLL listed inside the MULTI_SZ registry key HKLM\System\Kernel\injectDLL is loaded into every process.

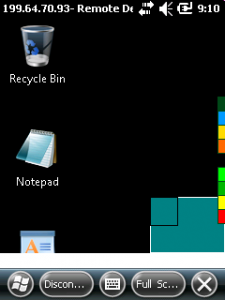
I would like to add some battery and wifi indicator to a full screen Remote Desktop Mobile (RDM) session. There are two specialized applications that display a small bar graph on the right of the screen, one for the battery level and one for the WiFi RSSI.

tsshellwnd_normal_with_wifi_and_batt_monitor_bars

The upper right one is for the WLAN RSSI and the lower bar shows the battery charge level.

As these apps should only add there display when RDM ist started, I added them to an injectDLL.

The injectDLL is loaded into every process that is started on the Windows Mobile device. Inside the DLLMain function, that every DLL has to implement, the code checks if the loading process is “\windows\wpctsc.exe”:

BOOL APIENTRY DllMain( HANDLE hModule, 
 DWORD ul_reason_for_call, 
 LPVOID lpReserved
 )
{
 if (ul_reason_for_call == DLL_PROCESS_ATTACH)
 {
 // Disable the DLL_THREAD_ATTACH and DLL_THREAD_DETACH notification calls
 DisableThreadLibraryCalls ((HMODULE)hModule);

 TCHAR szModuleFileName[MAX_PATH+1] = {0};
 TCHAR szRecord[MAX_PATH] = {0};
 if ((GetModuleFileName(NULL, szModuleFileName, MAX_PATH)) == NULL){
   wsprintf(szRecord, L"GetModuleFileName failed!");
   WriteRecordToTextFile(szRecord);
   return TRUE;
 }

 if (_wcsicmp(szModuleFileName, MODULE_FILENAME) != 0){
   wsprintf(szRecord, L"Compare ModuleFileName failed: %s", szModuleFileName);
   WriteRecordToTextFile(szRecord);
   return TRUE;
 }
...
 if ((hThread = CreateThread(NULL, 0, WaitForProcessToBeUpAndReadyThread, 0, 0, NULL)) == NULL)

MODULE_FILENAME holds the full name of the process we want to use. The above code simply returns without further action if the loader does not match the process we are looking for. If the process matches, the code creates a thread that will do the further processing. This avoids that the further actions block the watched process from being blocked or slow down.

The created thread just waits for the windows being ‘visible’ to the system and then starts the external processes:

  while ((hWndRDM = FindWindow(L"TSSHELLWND", NULL)) == NULL)
  {
...
  do{
    hChildWin=FindChildWindowByParent(hWndRDM, L"UIMainClass");
  }while(hChildWin==NULL);
...
  if(runProcess(L"\\Windows\\RdmAddonBatt2.exe", L"")==0)
    DEBUGMSG(1, (L"\\Windows\\RdmAddonBatt2.exe started\n"));
  else
    DEBUGMSG(1, (L"\\Windows\\RdmAddonBatt2.exe not started?"));
  if(runProcess(L"\\Windows\\RdmAddonWiFi.exe", L"")==0)
    DEBUGMSG(1, (L"\\Windows\\RdmAddonWiFi.exe started\n"));
  else
    DEBUGMSG(1, (L"\\Windows\\RdmAddonWiFi.exe not started?"));
...

In the above code the external processes are hard coded, but it would be easy to use the registry or a configuration file to replace the hard coded file names.

There are much more useful scenarios for using injectDLL.

Code at Github: RdmInject, RdmAddonBatt2, RdmAddonWiFi


Viewing all 25 articles
Browse latest View live